Kdenlive and Jog Shuttles 2022

Kdenlive is a powerfull Open Source Non-linear video editor that has been under development for at long time. There are extensive documentation for it, but one thing that I had trouble figurering out recently, is how to get it to work with my Contour ShuttlePro. This is a Jog Dial/Jog Shuttle device, that is very convenient, when working with video. This particular model has been superseeded with a newer model, the ShuttlePro V2, but they work in similar ways.

I don’t do a lot of video editing these days, so it seems every time I want to use my ShuttlePro, I have either updated my laptop of the Linux input interface has changed, so it does not work. This is sort of annoying to me, as I believe I wrote some of the original Jog Shuttle code in Kdenlive almost 14 years ago (I don’t think there is much of that code left, to be honest, but still :-)).

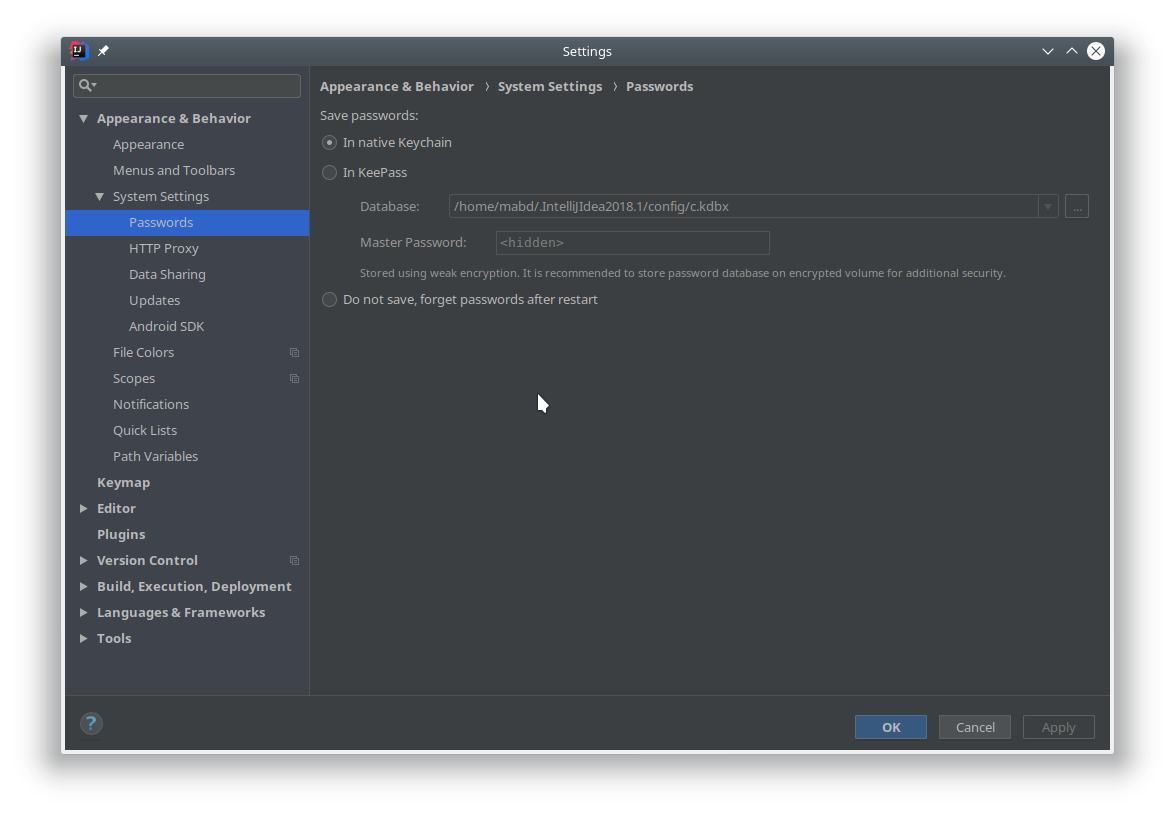
This is how Kdenlive looks, under settings|Jog Shuttle, when no Jog Shuttle has been detected:

No Jog Shuttle found. Could have provided better feedback there. And apologies for beeing in Danish, I am sure you can figure it out.

The solution for me was to follow the instructions posted here. Note, however, that this information was for the V2 device, so, I will summarize what I found:

For Contour ShuttlePro, add a file called /etc/udev/rules.d/90-contour-shuttlepro.rules, with this content:

SUBSYSTEMS=="usb", ATTRS{idVendor}=="0b33", ATTRS{idProduct}=="0010", MODE="0444"

And, if you have a ShuttlePro V2, add the same file, but with this content:

SUBSYSTEMS=="usb", ATTRS{idVendor}=="0b33", ATTRS{idProduct}=="0030", MODE="0444"

After that, restart the udev system like this:

sudo /etc/init.d/udev restart

As found on the above link, you need to disable the part of the input, that makes Kdenlive/X see it the device as a mouse/pointer. Find it, and disable it, like this (you need to use the correct device id in the last line)

# xinput --list | grep -i shuttle | grep pointer
⎜   ↳ Contour Design ShuttlePRO    id=32   [slave  pointer  (2)]
# xinput --set-prop 32 "Device Enabled" 0

Now, unplug your device, then reinsert it. If you go to Kdenlive JogShuttle settings, and press the “reload” button, it should look something like this:

Horray! Kdenlive have detected my Jog Shuttle.

Now you can start configurering the buttons. Here are my settings (still in Danish)

And, if you look in the configuration file for kdenlive (typically ${HOME}/.config/kdenliverc) , you can see something like this in it:

[shuttle]
enableshuttle=true
shuttlebuttons=button0=monitor_pause;button1=mark_in;button2=mark_out;button3=monitor_seek_backward-one-frame;button4=monitor_seek_forward-one-frame;button5=monitor_seek_backward-one-second;button6=monitor_seek_forward-one-second;button7=monitor_play;button8=monitor_seek_snap_backward;button9=monitor_seek_snap_forward;button10=seek_start;button11=seek_end;button12=seek_clip_start;button13=seek_clip_end;button14=mark_in;button15=mark_out;button16=monitor_seek_backward-one-frame;button17=monitor_seek_forward-one-frame;button18=monitor_seek_backward-one-second;button19=monitor_seek_forward-one-second;button20=monitor_play;button21=monitor_seek_snap_backward;button22=monitor_seek_snap_forward;button23=seek_start;button24=seek_end;button25=seek_clip_start;button26=seek_clip_end
shuttledevice=/dev/input/by-id/usb-Contour_Design_ShuttlePRO-event-if00
shuttledevicenames=Contour Design ShuttlePro
shuttledevicepaths=/dev/input/by-id/usb-Contour_Design_ShuttlePRO-event-if00

When Intellij IDEA 2018.1.15 keeps forgetting db passwords on Kubuntu

Recently, I installed Intellij IDEA Ultimate 2018.1.15 under a fresh Kubuntu 18.04 installation. Everything seemed to work, but during the course of a couple of days, I was annoyed that IDEA kept asking for passwords for my database connections. A little bit of digging turned entries like this up in my log file:

2018-06-18 10:35:02,138 [2310199] ERROR - redentialStore.CredentialStore - secret_password_lookup_sync error code 32638, error message null 
java.lang.Throwable: secret_password_lookup_sync error code 32638, error message null
 at com.intellij.openapi.diagnostic.Logger.error(Logger.java:123)
 at com.intellij.credentialStore.SecretCredentialStore.get(linuxSecretLibrary.kt:146)
 at com.intellij.credentialStore.CredentialStoreWrapper.get(CredentialStoreWrapper.kt:52)
 at com.intellij.ide.passwordSafe.impl.PasswordSafeImpl.get(PasswordSafeImpl.kt:54)
 at com.intellij.database.access.DbCredentialManager$getAsync$1.get(dbCredentialManager.kt:46)
 at com.intellij.database.access.DbCredentialManager$getAsync$1.get(dbCredentialManager.kt:21)
 at com.intellij.database.dataSource.AsyncUtil.lambda$null$6(AsyncUtil.java:58)
 at com.intellij.database.dataSource.AsyncUtil.lambda$underProgress$14(AsyncUtil.java:130)
 at com.intellij.openapi.progress.impl.CoreProgressManager.registerIndicatorAndRun(CoreProgressManager.java:580)
 at com.intellij.openapi.progress.impl.CoreProgressManager.executeProcessUnderProgress(CoreProgressManager.java:525)
 at com.intellij.openapi.progress.impl.ProgressManagerImpl.executeProcessUnderProgress(ProgressManagerImpl.java:85)
 at com.intellij.database.dataSource.AsyncUtil.underProgress(AsyncUtil.java:136)
 at com.intellij.database.dataSource.AsyncUtil.underProgress(AsyncUtil.java:130)
 at com.intellij.database.dataSource.AsyncUtil.lambda$captureIndicator$7(AsyncUtil.java:58)
 at java.util.concurrent.CompletableFuture$AsyncSupply.run(CompletableFuture.java:1590)
 at com.intellij.openapi.application.impl.ApplicationImpl$1.run(ApplicationImpl.java:305)
 at java.util.concurrent.Executors$RunnableAdapter.call(Executors.java:511)
 at java.util.concurrent.FutureTask.run(FutureTask.java:266)
 at java.util.concurrent.ThreadPoolExecutor.runWorker(ThreadPoolExecutor.java:1142)
 at java.util.concurrent.ThreadPoolExecutor$Worker.run(ThreadPoolExecutor.java:617)
 at java.lang.Thread.run(Thread.java:745)
2018-06-18 10:35:02,139 [2310200] ERROR - redentialStore.CredentialStore - IntelliJ IDEA 2018.1.5 Build #IU-181.5281.24 
2018-06-18 10:35:02,139 [2310200] ERROR - redentialStore.CredentialStore - JDK: 1.8.0_152-release 
2018-06-18 10:35:02,139 [2310200] ERROR - redentialStore.CredentialStore - VM: OpenJDK 64-Bit Server VM 
2018-06-18 10:35:02,139 [2310200] ERROR - redentialStore.CredentialStore - Vendor: JetBrains s.r.o 
2018-06-18 10:35:02,139 [2310200] ERROR - redentialStore.CredentialStore - OS: Linux 
2018-06-18 10:35:02,139 [2310200] ERROR - redentialStore.CredentialStore - Last Action: DatabaseView.SynchronizeAction

Googling did not turn up a lot of information, but someone suggested that you could use the settings to change your keystore approach:

Screenshot_20180619_085634

However, I wanted to use the native keychain. Turns out, that installing gnome-keyring does the trick:

sudo apt install gnome-keyring

The first time you store a password, you will be asked for a master password. Then it seems to work from there on.

Kubuntu 16.04 – pain and suffering

I recently decided to upgrade from 14.04 to 16.04 of kubuntu on my personal workstation.

What a pain.

The upgrade is fluent enough, but support for dual displays in plasma is now about as broken as in Windows 7, and kmail seems to have been hit by dementia.

  • One used to be able to set a single image for the whole extended desktop. This is no longer an option.
  • Every other time I dock my laptop, plasma decides the toolbar wants to live on the other screen from last time. Frustratingly, this also means that krunner now only live on one screen. Since I use krunner all-the-time, this is frustrating to me.
  • I can no longer drag a tab from Firefox onto a desktop and have it open a new Window. I have to use “Open in new Window”.
  • My kmail client seems totally unable to remember any set shortcuts. I have to import my shortcuts every time I start a kmail session.

I think the reason for most of this is the change from KDE4 to KDE5. Or something. The change from KDE3 to KDE4 also broke kmail – at that point it was the “semantic” desktop. I am sure there is a simple reason why kmail refuses to recall my shortcuts automatically, but its really annoying (one might ask why I am not debugging this, instead of venting my frustrations here… ).

On the bright side:

  • This is about the worst I have experienced in updates, and I have run kubuntu for more than 10 years.
  • If I care, I can get all my money back. (I have gotten +10 years of OS bliss for free…)
  • This is OpenSource, I can fix it! (If only I had the time).
  • It still works way better than the Windows desktop I am forced to use at work.

Well, No fixes as of now, but a quick workaround, at least for the problem with docking. This simple script:

#!/bin/bash
# Restart plasma and krunner when broken
kquitapp5 plasmashell
kquitapp5 krunner
sleep 2
nohup plasmashell &
nohup krunner &

restarts plasmashell and krunner, and sets up the desktop correctly for me.

Next, left as an exercise, is configuring this to run automatically when dokc/undock. Check LaptopLidAndDockScripts for more information on this...

Google forms, and reordering pages

I had to design a somewhat large online suvery in Google forms, and was missing a way to move pages around. It seems this functionality is not part of the system. And, even though you can control page order by linking them, this wrecks havoc with the progress bar, that is only calculated by page number, not order. So, I wrote this Google App Script to fix it. It is rather crude, and I do not understand the project model, and what not, but you can probably google that part.

Also, I only needed to move pages forward. If you need to move pages backward, you will either have to write that code, or move all other pages forward. Use the “MovePages” function to control it, run it from the toolbar.

Here goes:


// Code to reorder pages, and get some information when working with many pages.
// by Mads Bondo Dydensborg <mads@dydensborg.dk>


// Page handling in forms are weird. A page consists of a pagebreak and a number of items.
// Expect the first page, that are only items, and you can not change the first two items, which
// are not even part of the items array.

// Call this to move a number of pages.
function MovePages() {
// movePageForward( 28, 17 );
for ( var i = 30; i <= 37; ++i ) {
// movePageForward( i, i - 9 );
}
}

// Helper/info function
// Show alert box with all titles of all pages
function listTitles() {
var firstItem = FormApp.getActiveForm().getItems()[0];

var titles = "Page 1 : 'Your Title'\n";
var count = 1;
var titles = titles + getAllPageItems().map(
function(item) {
++count;
return "Page " + count + " : " + item.getTitle() + "";
}).join("\n");
FormApp.getUi().alert("List of pages", titles, FormApp.getUi().ButtonSet.OK );
}


/////////////////////////////////////////////////////////////////////////////
// These numbers are based on the users perspective.
// The first page is called "1", and does not usually have a page_break to begin with!
// This method moves a page forward,
function movePageForward(pageNumber, toBeforePageNumber) {
// Check bounds
checkPageBounds(pageNumber);
checkPageBounds(toBeforePageNumber);
// Check ordering, as this moves forward
if ( pageNumber <= toBeforePageNumber ) {
throw new Error( "This method can only move pages forward" );
}
Logger.log( "Moving page " + pageNumber + " to before page " + toBeforePageNumber );
// Forward approach: Identify item index number to move to
// Collect all item instances
// Ask the form to move them
var beforeIndex = getPageItem(toBeforePageNumber).getIndex();
// FormApp.getUi().alert( "Moving to index : " + beforeIndex );
Logger.log( "Moving page " + pageNumber + " to index " + beforeIndex );
// Collect items
var movingPageItems = getPageItems(pageNumber);
// Move them all!
var form = FormApp.getActiveForm();
for( i = 0; i < movingPageItems.length; ++i ) {
Logger.log( "Moving item with global index : " + movingPageItems[i].getIndex() + " to index : " + (beforeIndex + i) );
form.moveItem( movingPageItems[i], beforeIndex + i);
}
}

/////////////////////////////////////////////////////////////////////////////
// Get all items related to a given page.
function getPageItems(thisPageNum) {
Logger.log("Getting items for page number: " + thisPageNum );
checkPageBounds(thisPageNum);
var thisPageItems = []; // Used for result
var thisPageBreakIndex = getPageItem(thisPageNum).getIndex();
Logger.log( "This is index num : " + thisPageBreakIndex );
// Iterate from this, until we meet a PAGE index type
// Get all items
var form = FormApp.getActiveForm();
var allItems = form.getItems();
thisPageItems.push(allItems[thisPageBreakIndex]);
Logger.log( "Added pagebreak item: " + allItems[thisPageBreakIndex].getIndex() );
for( var i = thisPageBreakIndex+1; ( i < allItems.length ) && ( allItems[i].getType() != FormApp.ItemType.PAGE_BREAK ); ++i ) {
thisPageItems.push(allItems[i]);
Logger.log( "Added non-pagebreak item: " + allItems[i].getIndex() );
}
return thisPageItems;
}


/////////////////////////////////////////////////////////////////////////////
// Get all the pagebreak items
function getAllPageItems() {
// Get the form
var form = FormApp.getActiveForm();
// All the pagebreak items
var pageItems = form.getItems(FormApp.ItemType.PAGE_BREAK);
return pageItems;
}


/////////////////////////////////////////////////////////////////////////////
// Get the max page number in user numbering
function getMaxPageNumber() {
var pageItems = getAllPageItems();
// Number of pageBreaks + 1, is user number (2 pb => 3 pages => 3 is max number)
return pageItems.length + 1;
}

/////////////////////////////////////////////////////////////////////////////
// Check bounds, throw if outside
// user page number
function checkPageBounds(thisPageNum) {
if ( thisPageNum < 1 ) {
throw new Error( "Illegal page number, must be >=1 : " + thisPageNum );
}
if ( thisPageNum == 1 ) {
throw new Error( "Unable to handle first page, as it has no pagebreak" );
}
if ( thisPageNum > getMaxPageNumber() ) {
throw new Error( "Not enough pages in form to reference page number : " + thisPageNum );
}
}


/////////////////////////////////////////////////////////////////////////////
// Returns the item (page_break) at this page num
// pagenum is based on 1, as the users sees it
// We can't return for the number 1, as it has no pagebreak.
function getPageItem(thisPageNum) {
checkPageBounds(thisPageNum);
// Get the page it. First page is out of bounds, page 2 is array index 0
// So, substract 2
return getAllPageItems()[thisPageNum - 2];
}

Mounting 64 GB MicrosSD card formatted by GoPro camera under Linux Kubuntu 14.04

GoPro insists on using exFAT for its 64 GB cards. No problem, just install

$ sudo apt-get install exfat-fuse exfat-utils

However, on my laptop, something goes wrong when inserting the card, and it ends up complaining something along the lines of:

[37253.880674] Read(10): 28 00 00 00 00 00 00 00 08 00
[37253.880685] end_request: I/O error, dev sdd, sector 0
[37253.880691] Buffer I/O error on device sdd, logical block 0
[37254.110881] ldm_validate_partition_table(): Disk read failed.
[37254.110906] Dev sdd: unable to read RDB block 0
[37254.112293] sdd: unable to read partition table

I don’t know why that is. The card is fine. Kicking the partition table solves it (and I keep forgetting this, which is why I write it down here):

$ partprobe

And, as by magic, the card appears in the GUI stuff, etc, etc. and works flawlessly. I think I read the explanation at some point, but who cares. It works, just needs a light kick across the knee.

Resetting a Siemens WM16S series machine after F43 error / Nulstilling af Siemens vaskemaskine efter F43 fejl

OK, I could actually google this, but it took two hours, and the solution was in Dutch, on a German webpage, so I am writing this down in English and Danish in the hope that others may benefit from it in the future.

I have a Siemens washing machine from the 16S series (WM16S – there may be a sister series in Bosch). These machines may fail with an F43 error in the display. This is related to the motor, and may be that the motor needs new brushes (kul in danish), the Tacho (feedback mecanism) is broken, wiring or the motor control board. Most likely for a 6-7 year old washing machine is the brushes. They are relatively cheap, and how to change them is well known on the internet. (Do a youtube search : Biggest challenge is getting the electrical clips off, they are tiny to my clumsy fingers!).

However, after changing them, you still need to reset the machine. Various methods exists to do this, depending on the machine. Here are the exact steps needed to reset this particular model series (the WM16S series):

  1. Turn off the machine (dial to 0)
  2. Open the door
  3. Turn on the machine on first program
  4. Close the door
  5. Turn off the machine
  6. Turn on the machine on the “six-o-clock” program, which is centrifuge
  7. Press the “option down” button and keep it pressed (This is the button left of the display)
  8. Turn the dial to “seven-o-clock” (empty/pump out program)
  9. Release the “option down” button
  10. Turn of the machine

This should reset the machine, and if everything is allright, it should work. If it does not work after changing the brushes and resetting it, something else is wrong, most likely the motor control board, or if the motor it very scarred, the motor it self.

Here is the same steps in danish, in the hope that this may benefit some danes.

Det er om Siemens vaskemaskiner mere specifikt dem fra WM16S serien, og det handler om at nulstille efter en F43 motorfejl, hvor man f.eks. har skiftet kul. Her er de skridt man skal igennem:

  1. Sluk maskinen (programvælgeren til 0)
  2. Åben døren
  3. Tænd maskinen, f.eks. på program 1
  4. Luk døren
  5. Sluk maskinen
  6. Tænd maskinen på programmet kl. 6 (centrifugering)
  7. Tryk på “option ned” pilen, lige til venstre for displayet, og hold den inde
  8. Drej programvælger til kl. 7 (et skridt med uret, til udpumpning)
  9. Slip “option ned” pilen
  10. Sluk maskinen

Jeg håber det virker for dig!

And, in dutch and german -i Think:

… Machine uit – Maschine aus
Deur open – Tür auf
Machine aan – Maschine an – “hab einfach das erste Programm genommen”
Deur dicht – Tür zu
Machine uit – Maschine aus
Draaiknop op 6 uur zetten – “Programm 6 Uhr” auswählen
Optieknop pijltje naar beneden indrukken en ingedrukt houden – Pfeil Taste “nach unten” links vom Display drücken und halten
Draaiknop naar 7 uur zetten ( 1 stand verder dus) – Programm 7 Uhr wählen – also einfach ein Programm weiter drehen
Loslaten – die Pfeil Taste wieder loslassen
Draaiknop op machine uit – Maschine ausschalten

Creating ER Diagram for SQLIte database

Found that creating a simple ER Diagram from an existing SQLite database was surprisingly hard. A number of tools have problems with the SQLite driver, does not show foreign keys, or simply does not work. However, I found that the free edition of DbVisualizer was able to create a very nice ER Diagram for the database I was working with, and exports in both pixel and vector formats.

Now, if only I could find a working command line tool…

Assembling and getting started with the RepRap Prusa i3 Hephestos 3D printer kit from bq

I recently got a RepRap Prusa i3 Hephestos  3D printer kit, from bq and this is some notes about assembling it, and getting starting using it.

First a disclaimer: I am by no means an “electronics” guy. I do have minimal solder knowledge, and access to most ordinary hand tools (inclusive a bench vice), but I have never done much electronics, nor 3D printing before I got this kit. I have not followed reprap.org, or anything like that. I did have a 3 hours “hands on course” in using a 3D printer (Ultimaker), about a week before I got this printer, but nothing else. I got the kit, because I wanted to 3D print, and needed a kit that was easy to assemble, and easy to set up. Not because I wanted to actually build/customize a 3D printer (that quickly followed though, but that is another story).

Assembly

First impressions: everything extremely neat packaged, in high quality boxes, with clear indications. Everything seemed like very high quality. Very, very nice and very comforting. (I have later learned that one does pay somewhat more for this kit than if one sourced by oneself, but I would buy the kit again in an instant, if I needed another 3D printer of the same type).

The package came with a Spanish set of assembly guides. Beeing somewhat challenged by Spanish, I located the english guides and additionally I did consult once or twice with the assembly video. (Bq frequently updates the assembly video, at least, so make sure to check out if a newer exist!).

In general the assembly guides are very good, and assembly was very straightforward. I would rate assembly difficulty a good step above IKEA furniture, and somewhat on par with the most complicated LEGO Technic sets. You should not be unfamilar with normal hand tools, or scared by soldering though. Timewise, I was able to go from scratch to first print in a single (sun)day, and assembling was very rewarding and even fun! (And I learned some valuable techniques, actually).

A few steps in the assembly were unclear:

  • One should probably mount the Z endstop before mounting the smooth rod.
  • It is a good idea to check that the X belt tensioner can move freely, before assembling the X axis completely.
  • When putting the cables for the extruder and X axis engine into the flexible joined “thingy”, it is quite unclear which end goes where: what is the “start” of a cable. I managed, but I think it was by luck more than by anything else. I believe the part with 27 joins in the manual should only have 25 joins, and vice versa.
  • The mount for the fan to cool the electronics (RAMPS) has difficult to reach allan screws, when the Z axis has been mounted. I shortened an 2.5 mm allan key and used that.
  • The holes for mounting the bed are tigth! I used a 3 mm screw from the other side, and even tapped some of the holes.
  • Don’t overtighten the Y endstop mount screw – it does not go all the way in!

All in all, I was very happy with the kit, and the assembly, and compared to some of the horror stories on reprap.org (for cheap kits), it was a very happy experience. Complicated at times, but the good folks at bq has done a lot to make it easy.

However, they failed a bit in one aspect: When assembly is done, there are no more manuals. I was sure I needed to do some calibration, but this is not mentioned in the manual. And, there was no indication on how to use e.g. the printers physical interface. Luckily, I found some information on reprap.org. The next section is about this.

Final calibration & getting started

The physical interface on the printer is called a “smart controller”, and is very much like this from RepRapDiscount. Basically you control the printer by turning “the knob”, and pressing it to select menu entries. The small button in the lower right corner is a “panic button”, I think: It stops whatever the printer is doing, and you need to powercycle it to get it going again, or use one of the reset buttons: there are two, one on each electronics board (Arduino and RAMPS) and they are both placed facing left, near the place where the power lines goes into the RAMPS, and are easily pressed when facing the front of the printer.

The firmware used is called “Marlin”. I have not really seen any documentation for using it, but its like navigating a menu on an old-style HP printer or similar. You will figure it out quickly.

To calibrate the printer after assembly, you need a couple of steps more

  • Adjusting the two z axis rods: basically measure from the surface that the X axis is level. Rotate each Z axis rod (while the machine is off) until it is level.
  • Levelling the bed: Use the autolevel feature of the printer – you should adjust the bed to allow a piece of paper to slide beneath the extruder and the bed.

There are more information about final calibrating at reprap.org. Note also the point about cleaning the extruder – you may need that. (Why this information is not printed, I do not know).

The last issue I had, was feeding the filament into the extruder. You should of course use the “Control|Filament|Load” option on the interface, but you should also press the button on the extruder to insert the filament. Now, that button is really hard to spot! Its actually the top of a spring loaded lever, that keeps a roller tight agains the motorshaft that feeds the filament. On this image, it is the “low” part of the top of the extruder. Its near the frame, between the frame and the filament feed hole.

Cura profiles

BQ provides cura profiles at the download page, bottom under “Perfil_Extrusion_Cura.zip“. With this, you can easily download a thing from thingiverse or a similar site, run it through cura, write the gcode to a suitable SD card, insert it into the printer, and get printing.

Happy Printing!

SMB and NFS performance on a Synolog DS213J with two WD red disks

When you google for facts about which is fastest, sharing using SMB or NFS on a Synology DS231J, you may get quite confused. I did some measurements, and while it seems that SMB (suprisingly) is the fastests for writing a single large (1.4 GB) file, NFS is on par for lots of smaller files (say MP3, about 1.4 GB in total), and out beats SMB quite comfortably when reading.

Some unformel measurements (1Gbps network, disks mirrored), done with rsync.

  • NFS, large file: write: 47 mB/s, read: 102 mB/s
  • SMB, large file: write: 60 mB/s, read: 102 mB/s
  • NFS, small files: write: 41 mB/s, read: 81 mB/s
  • SMB, small files: write: 40 mB/s, read: 37 mB/s

(I unmounted and remounted the file systems between all tests, ran the tests several times, etc).

I can’t explain the results. However, in all cases, the nfsd dæmon seemed to use a lot more CPU, in the case of writing a large file, it seemed the CPU had no idle cycles left. When reading lots of small files, nfds used multiple processes/threads to serve (4*6-8%), whereas the smbd seemed to be very idle (6%). Perhaps the nfsd is better at reading from the mirrored disk, whereas it is cpu bound on the large file write.

I plan on reading files from my NAS a lot more than writing (I use it as a media server), and since I use it with Linux clients, NFS makes the most sense.

Libreoffice basic limitations

Just spent and hour(!!) figuring out that Libreoffice Basic, the function https://help.libreoffice.org/Basic/CDateFromIso_Function_Runtime does *not* work with “-” in the input. That is, it used to work for me, until 2013-09-30, but 2013-10-01 does not work. It breaks, and it needs the input like 20131001.

This kindof suck, as ISO includes the dashes. Oh well.

And, to make it worse, Libreoffice basic does not have a string replace function! (I guess VB doesn’t either). Found a replace function here: http://wiki.openoffice.org/wiki/Documentation/BASIC_Guide/Strings_%28Runtime_Library%29

Why this is not part of the standard library, I can only guess on. Sigh.